Tailscale and the networking rabbithole
Why I couldn't reach my laptop from my phone, and the trip through NATs, STUN, TURN and VPNs that ended with building my own mesh VPN.
A really annoying problem I had a year ago was that I couldn't listen to something on my phone while away from my laptop if my laptop was still connected to my earphones and playing audio. I had to either stop whatever was playing on my laptop or turn off Bluetooth altogether, meaning I'd have to walk back to my laptop. Unacceptable. So naturally, I decided to expose ssh on my laptop so I could remotely run commands from my phone and just nuke bluetooth from anywhere on my network. Wouldn't it be really cool if I could ssh into my laptop from any network so I could control agents running on it even when I'm not home. But my laptop didn't have a public IP. It was sharing an IP with every other device connected to my router and probably others on my ISP's network. That's when I found out about this radically new tech called mesh networking(1960s).
STUN
There are only a few IPv4 addresses and like most things, there's not enough for everyone. So, your ISP has it's clients share one public IP and uses a NAT to route internet traffic. NATs have a few rules however. They work on NAT tables. Every time you want to reach Google.com let's say. You make an outbound request, it goes from your device through your router to a NAT. The NAT opens a temporary port and with it's own public IP makes a request to google's servers. It keeps this port open for a while and stores an entry in it's table for the port corresponding to your device. When a response arrives from google to the port, it checks it's table and forwards the request back to your device. Each entry is temporary and is dropped so these ports keep changing.
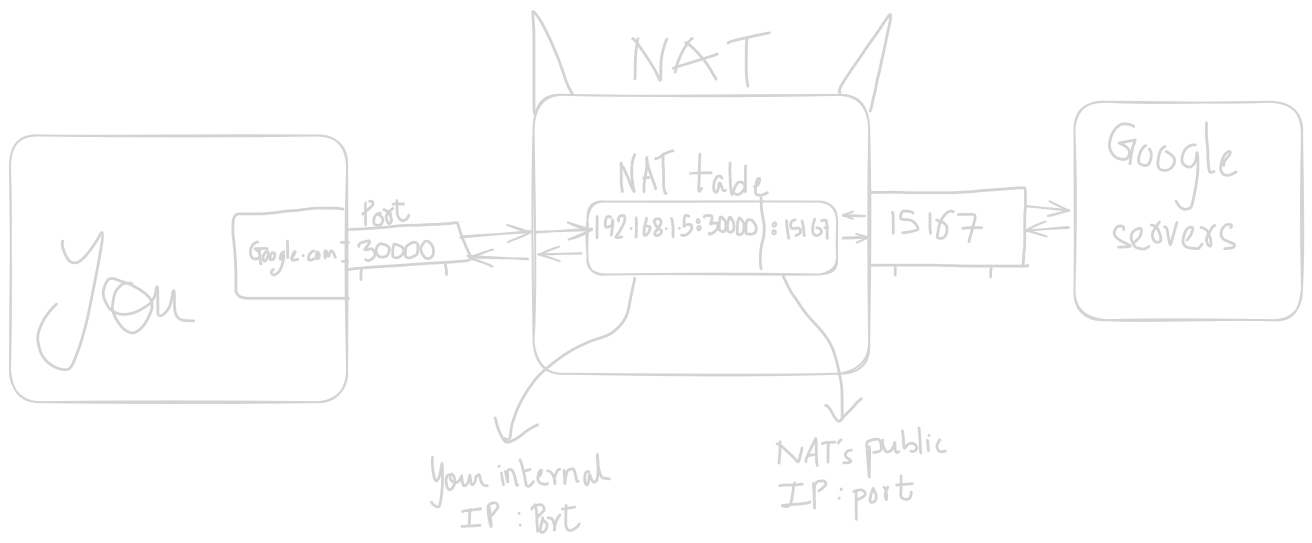
That's why when a device from outside your network tries to reach you at your public ip on a random port, it just fails because there needs to be an entry in the NAT table. For traffic to reach a device inside a network like this, it has to make an outbound connection first.
To get around this we use something called UDP hole punching. If two devices behind two NATs want to talk to each other directly, they first reach out to a matchmaker server. Your device sends a UDP packet to the server. It has to go through your NAT, your NAT takes this packet and uses its ip and port to make the request. The other machine does this as well. The server now has both of your NATs' ips' and ports. It then exchanges this information with the two machines. Both machines now send UDP packets to each other's NATs and voila, you have established a peer to peer connection and essentially punched a hole.
Tailscale allows you to do exactly this and I use it to ssh into my laptop from my phone even if both of them aren't on the same local network.
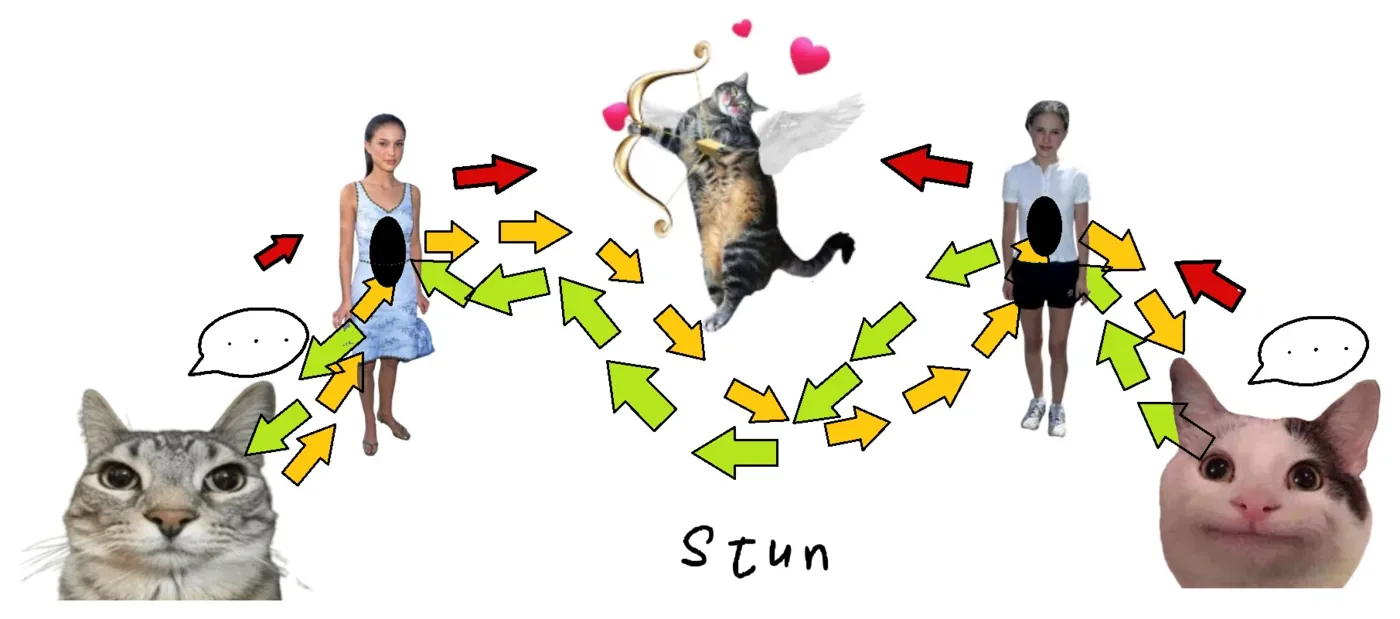
Gopika was kind enough to demonstrate this with a picture. She illustrated a NAT with Ports as Natalie Portman so you'll never forget it.
Usually I don't concern myself with real world applications. I didn't for a while. I found out about this, installed Tailscale and never thought I'd actually need to use this anywhere else. That was until I was learning about blockchains. The entire idea of blockchain comes from the need for decentralization. I'd made a project with this using docker containers as nodes all talking to each other directly on my machine. It was brought to my attention that no one was going to pull my Github repository, set up docker compose and watch in awe as text prints in a terminal. The people wanted more.
I had to make a web interface for this. As much as I disliked frontend, it had to be done. I wanted to make a toy cryptocurrency that people could join using their browsers. They should be able to send it and even mine fresh currency. Initially I decided to have a traditional backed that would store, maintain and validate the chain. It was the only thing I knew. That would however defeat the whole purpose of a cryptocurrency. If a server validates everything and is the source of truth, it's just a regular database with extra steps. I could however build it anyways but that didn't sit well with me. Even if no one was going to use it, it had to be the real thing.
I researched about it a bit and discovered webRTC. That was just UDP hole punching but for browsers. I made nodes in the network as browsers and they'd talk over webrtc. I made a Go matchmaker server and a webRTC frontend and now people can reach it over browsers.
UDP hole punching or STUN isn't guaranteed to work however and if it doesn't, you need to have a fallback. The fallback is called TURN.
TURN
TURN is short for Traversal Using Relays around NAT which is fancy speak for a server that takes packet from a machine and just forwards it to the destination. TURN solved another problem I was having. I didn't like how cloud providers charged extra for an IPv4 address for your virtual machines. I guess it's fair but I didn't like it regardless. You could get an IPv6 address for free for your VM but my ISP at home did not have an IPv6 address at all. This meant I couldn't connect to an IPv6 instance from my home wifi. I would need a relay server that would have both an IPv4 and an IPv6 address to translate network traffic. For a VM that I could configure, I could just add it to my Tailnet and let the Tailscale infrastructure handle the heavy lifting. But I ran into a similar problem with Supabase. Their connection URL only worked with IPv6 machines. Now I could either use their Session Pooler (Zero setup. Works out of the box with IPv4) or I could build my own relay server from scratch and have my fun with it. I chose the latter obviously.
VPNs
On my IPv6 VM the problems didn't end. Github servers didn't support IPv6. Maybe they forgot with so many outages on their hands. My relay server only supported forwarding one port. So if you had postgres listening on 5432 on a remote machine, my app would forward that port to a local one on my home machine. It did not support forwarding all network traffic via my relay. There was a straightforward solution to this. I could just add the VM to my tailnet again and broadcast my home computer as an exit node (all traffic from the VM would be routed through my home computer). I didn't like this for 2 reasons:
- If the VM was ever compromised, someone could have network access to my home computer and potentially get in using open ports.
- This whole thing wouldn't work if my laptop was off
Network Interfaces
To send and receive packets in and out of a machine, the kernel has to talk to network interfaces that correspond to a physical network device. You can find these on your machine using ip link show on Linux. You'll see devices like wlan0 and eth0. These correspond to your wifi and ethernet adapters. When an application tries to send a packet, the kernel takes it checks the destination Ip and sends it through an interface. To decide which interface to send a packet to, the kernel checks the route table.
baship route show
textdefault via 192.168.1.254 dev wlp3s0 proto dhcp src 192.168.1.12 metric 600
The default route would send all network traffic through the wlp3s0 interface to your router which is 192.168.1.254 in my case. To send all traffic via a different device, you'd have to edit this route table.
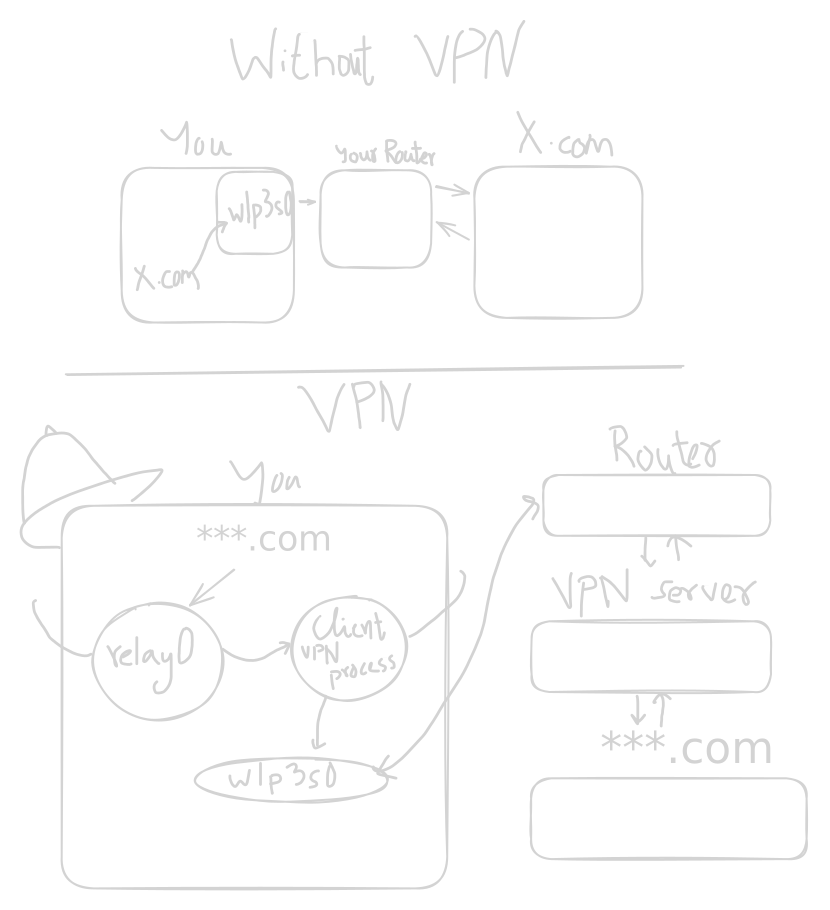
When I said interfaces need to always correspond with a physical network device, that wasn't entirely true. Your OS allows you to make virtual interfaces that send and receive traffic from a process instead of a physical device. The process would be the program we write for clients in this case. So, if you could send all traffic via this virtual interface, you'd have made a VPN.
Making my own VPN
First I had to make a virtual interface that my go process will listen on. I called it relay0.
The route table currently sends addresses under 0.0.0.0/0(which is every address) to the router. I want all traffic to be sent to relay0, our virtual interface and then we'd forward it all to our VPN server. I could edit the default route but if the client crashes or fails to revert it, I'd lose access to the internet. Instead I leave it untouched and add two more routes. The kernel will pick whichever route is more specific. So we divide all addresses into two parts
code0.0.0.0/1 covers 0xxx.xxxx.xxxx.xxxx
code128.0.0.0/1 covers 1xxx.xxxx.xxxx.xxxx
If we add both these records we cover the entire IPv4 range and we'd have priority over 0.0.0.0/0 since our routes are more specific. Lastly we add the route for the VPN server's IP to still go to the router.
code0.0.0.0/1 dev relay0 128.0.0.0/1 dev relay0 *Server IP* via 192.168.1.254 dev wlp3s0